1. Welcome
The D7 RCI Planning — Data Collection app is an interactive map for exploring FDOT District 7 Roadway Characteristics Inventory (RCI) data. You can look up any roadway, review its inventory and construction records, and open supporting attachments, video links, and route-survey footage.
This guide is written for the Viewer role. As a Viewer you have read-only access: you can browse, search, open, download, and watch everything in the application, but you cannot add, edit, or delete data. Editing tools are simply hidden from your view, so the interface stays clean and focused on finding information.
2. Signing in
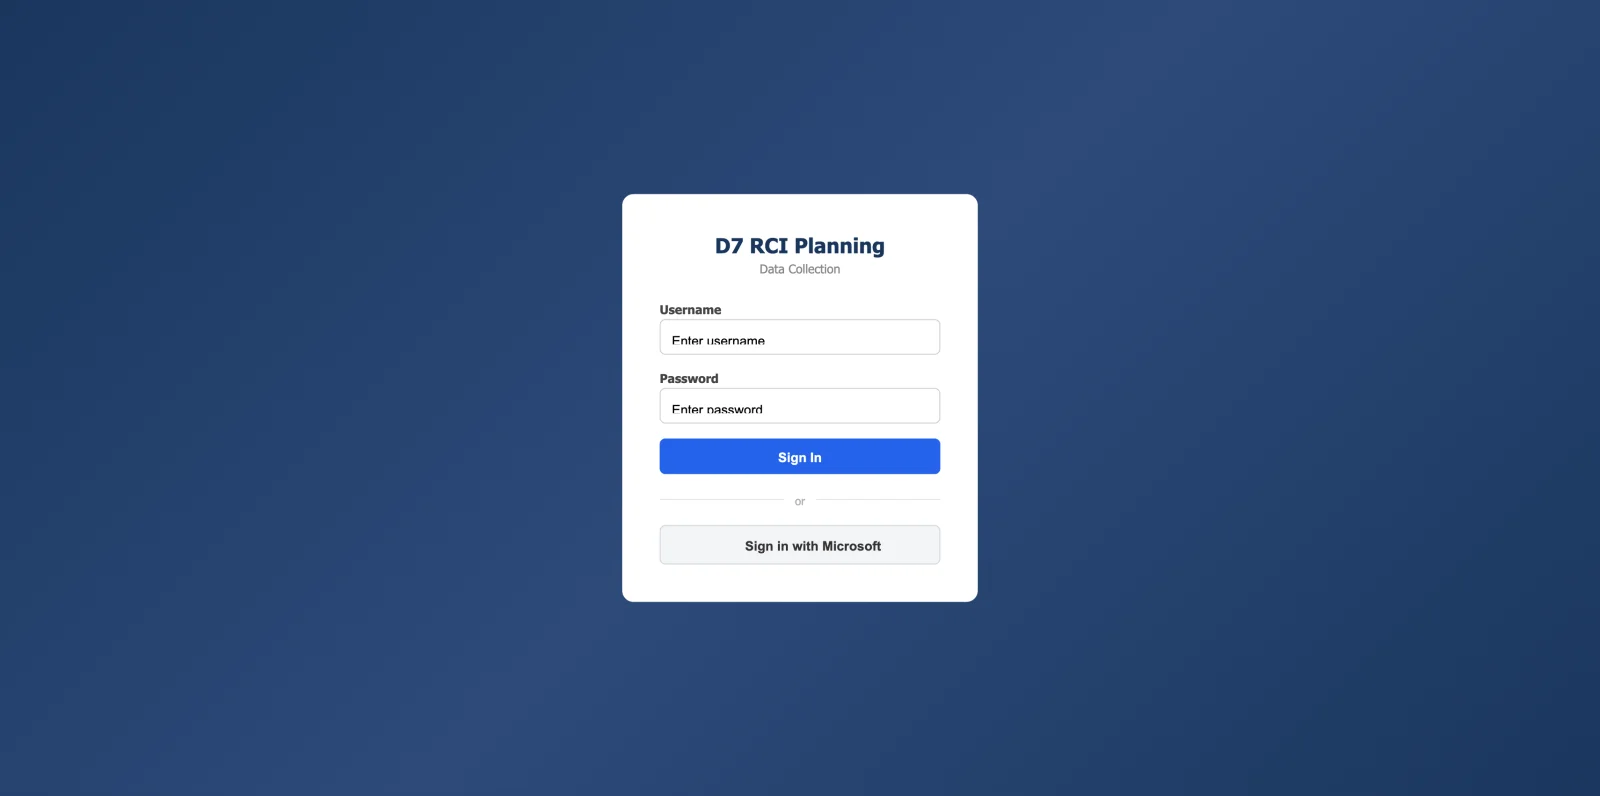
When you open the app you'll see the sign-in card. There are two ways to sign in:
- Username & password — enter the username and password provided to you, then
click
Sign In(or press Enter). - Microsoft — click
Sign in with Microsoftto use your organization (Entra ID) account.
After you sign in, the app opens to the map. If your password is wrong, a red message appears above the form — re-check your credentials and try again.
3. The screen at a glance
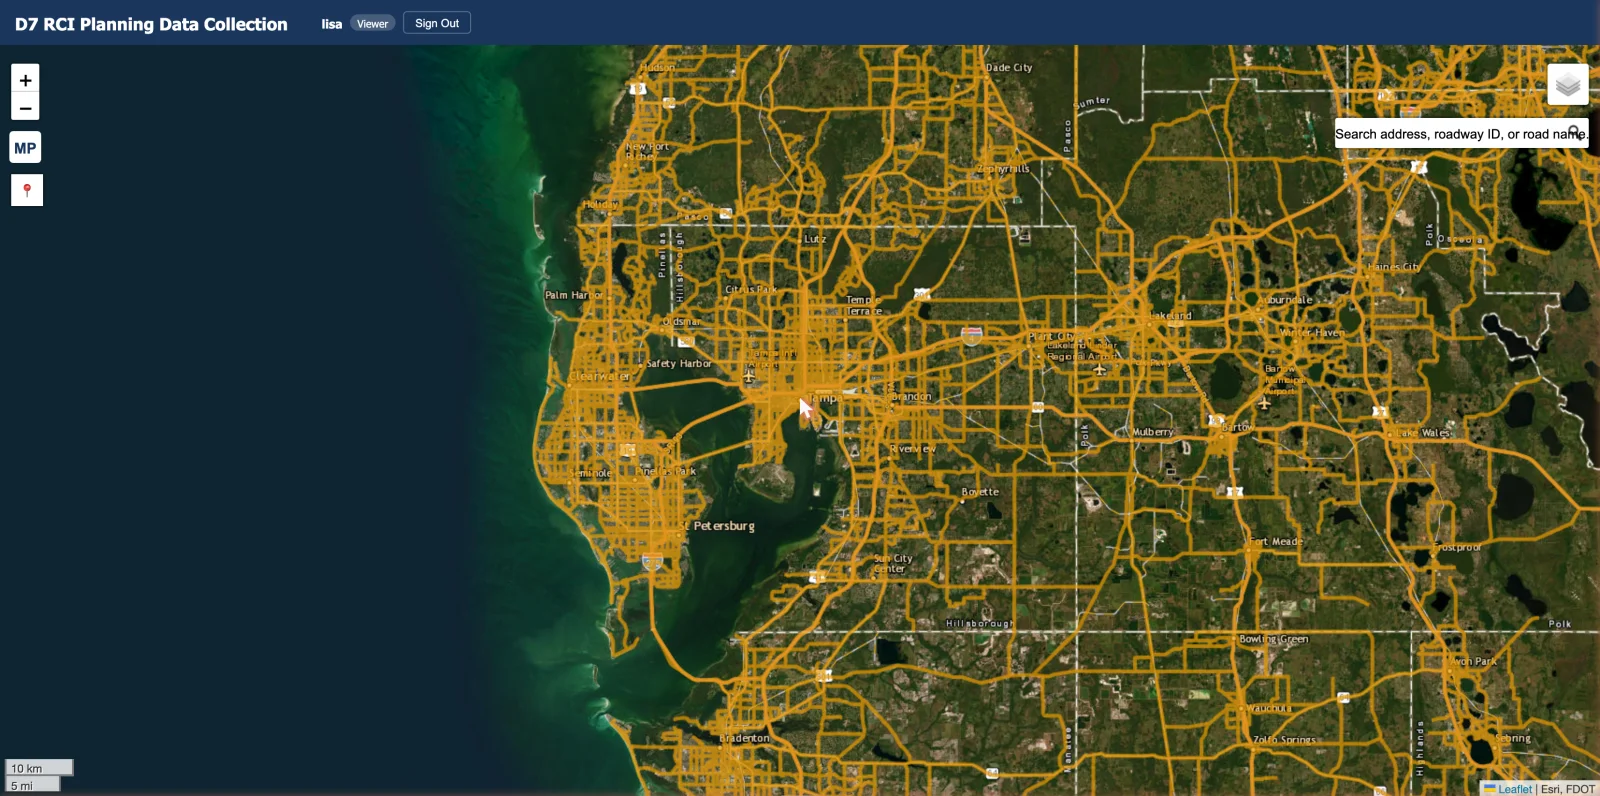
The app has three main areas:
- Header bar (top) — the app title, your name, your role badge
(Viewer), and a
Sign Outbutton. - Map (center) — the interactive map where you find and select roadways.
- Results panel (bottom) — a slide-up panel that shows the data tables for the roadway you've selected.
Signing out
Click Sign Out in the top-right corner at any time to end your session and return to the
sign-in screen.
4. Using the map
The map is your main tool. You can pan by dragging, and zoom with the mouse wheel or the controls.
Map controls
| Control | Location | What it does |
|---|---|---|
| Zoom + / − | Top-left | Zoom the map in and out. You can also use the mouse wheel. |
| Locate 📍 | Top-left | Zoom to your current location (your device asks permission first). |
| Milepoint zoom (MP) | Top-left | Type a roadway ID and a milepost to drop a marker at that exact point. |
| Basemap switcher | Top-right | Switch the background map and toggle overlay layers. |
| Scale bar | Bottom-left | Shows the current map scale. |
Basemaps & layers
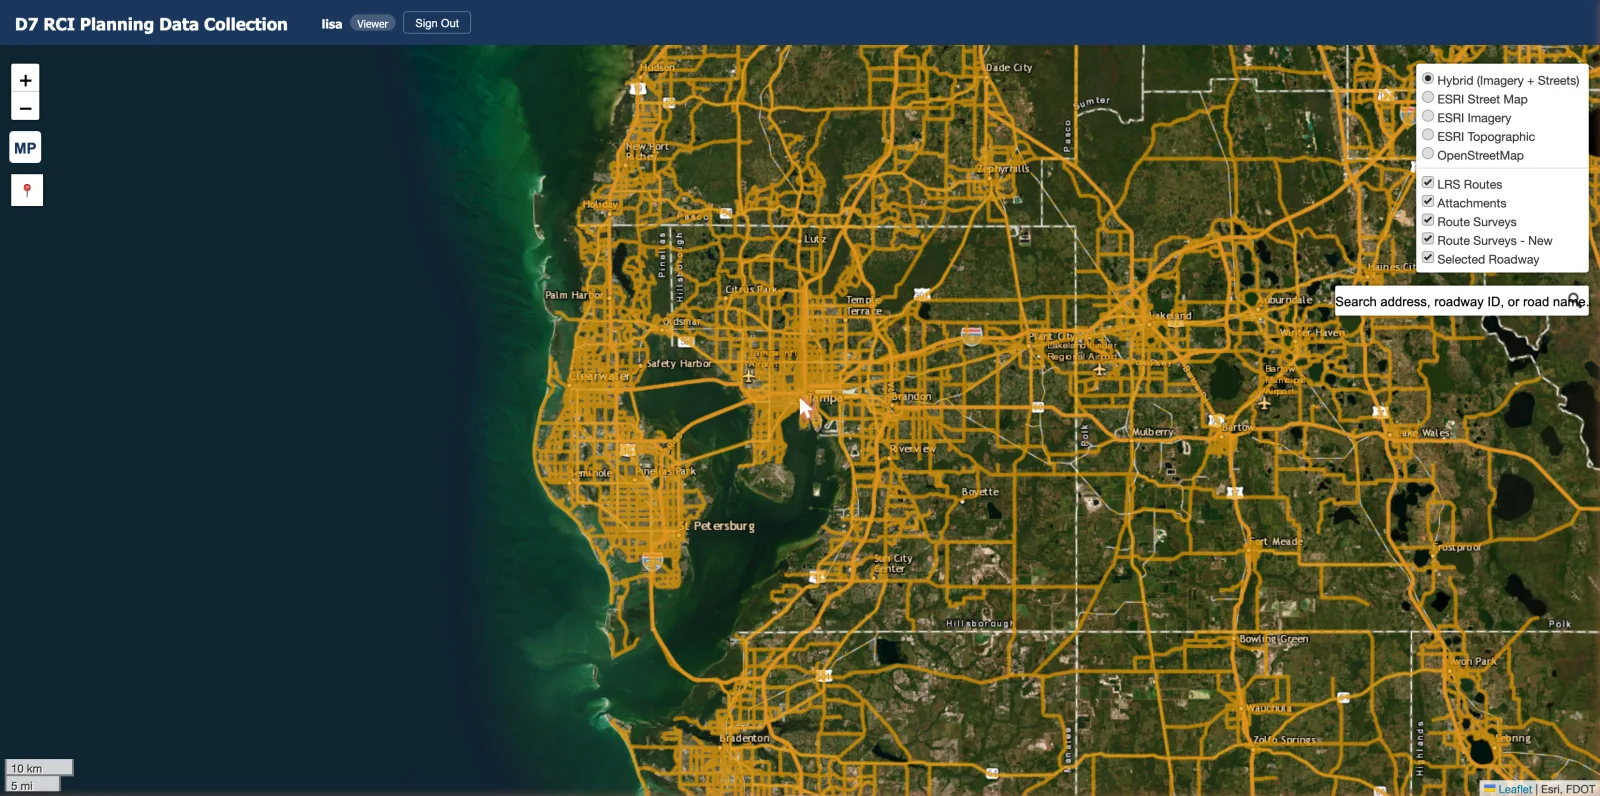
Hover the layers control (top-right) to choose a background map — Hybrid, ESRI Street Map, ESRI Imagery, ESRI Topographic, or OpenStreetMap — and to turn overlay layers on or off:
- LRS Routes — the FDOT roadway network.
- Attachments, Route Surveys, and Route Surveys – New — markers showing where supporting files exist.
- Selected Roadway — highlights the roadway you've clicked or searched (shown in yellow/orange).
Zoom to a milepoint
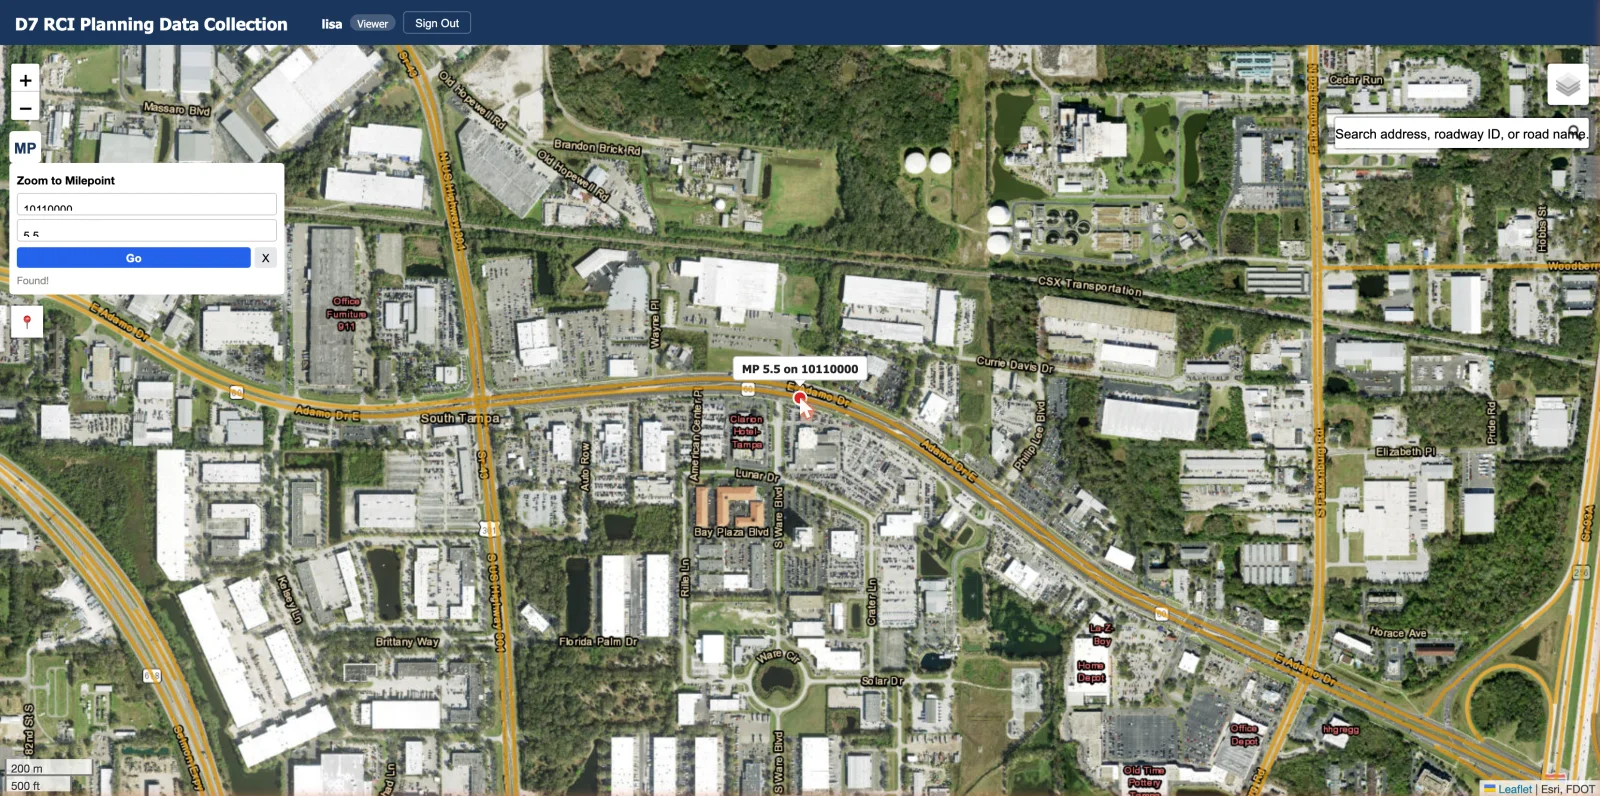
- Click the
MPbutton (top-left). - Enter a roadway ID (for example
10110000) and a milepost (for example5.5). - The map drops a red marker at that point with a tooltip showing the milepost and roadway.
5. Searching for a roadway
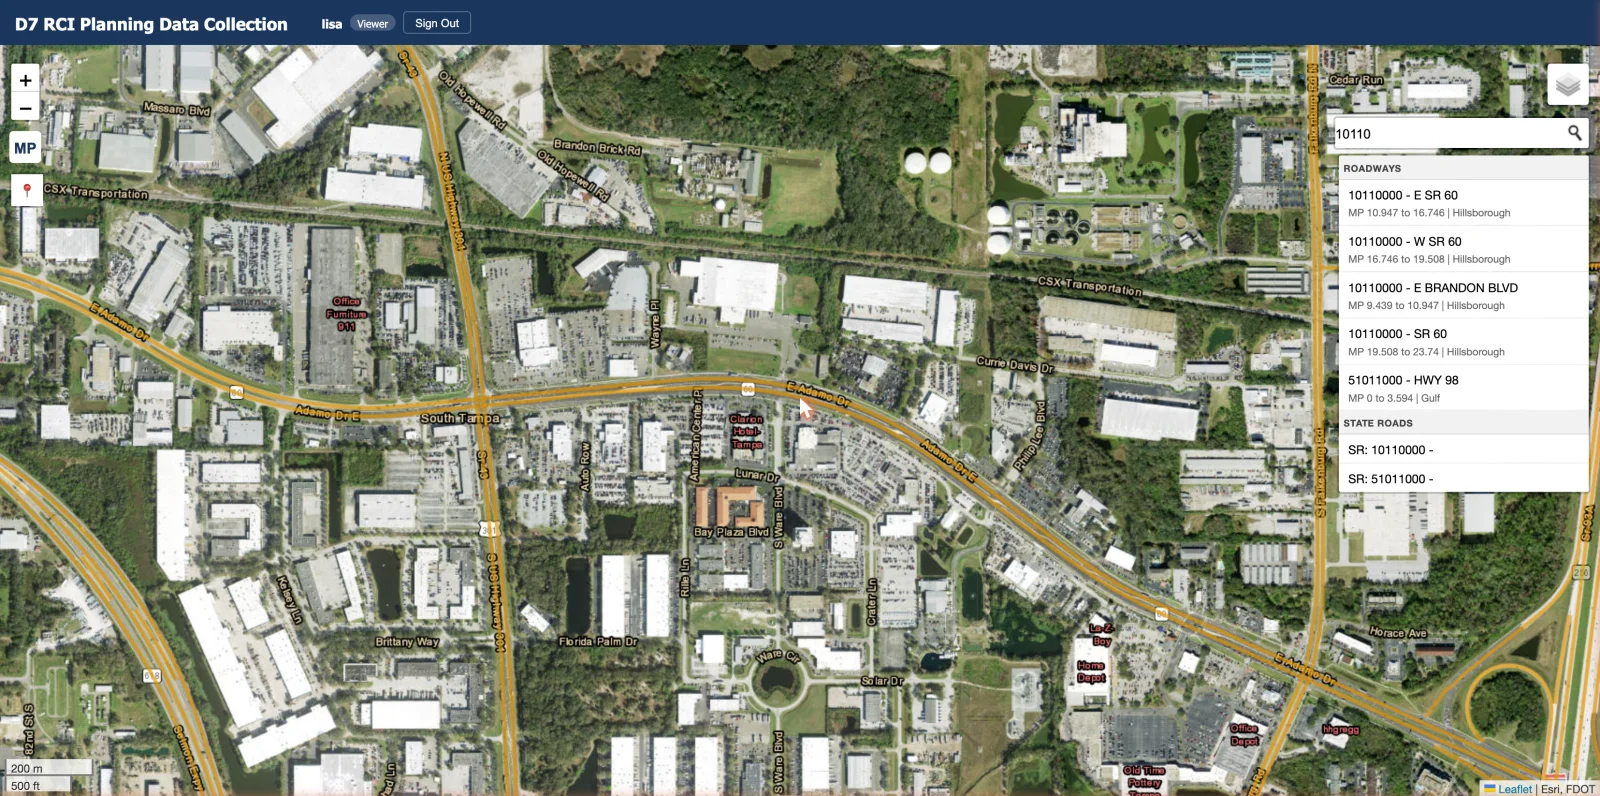
The search box sits at the top-right of the map. Start typing and choose a suggestion. You can search by:
- Address — a street address or place.
- Roadway — an FDOT roadway ID or road name.
- State Road — an SR number.
- New Survey — roadways that have a newly added route-survey KML.
When you pick a result, the map zooms in, highlights the roadway, drops a marker, and opens a popup with the matching records.
6. Clicking a roadway
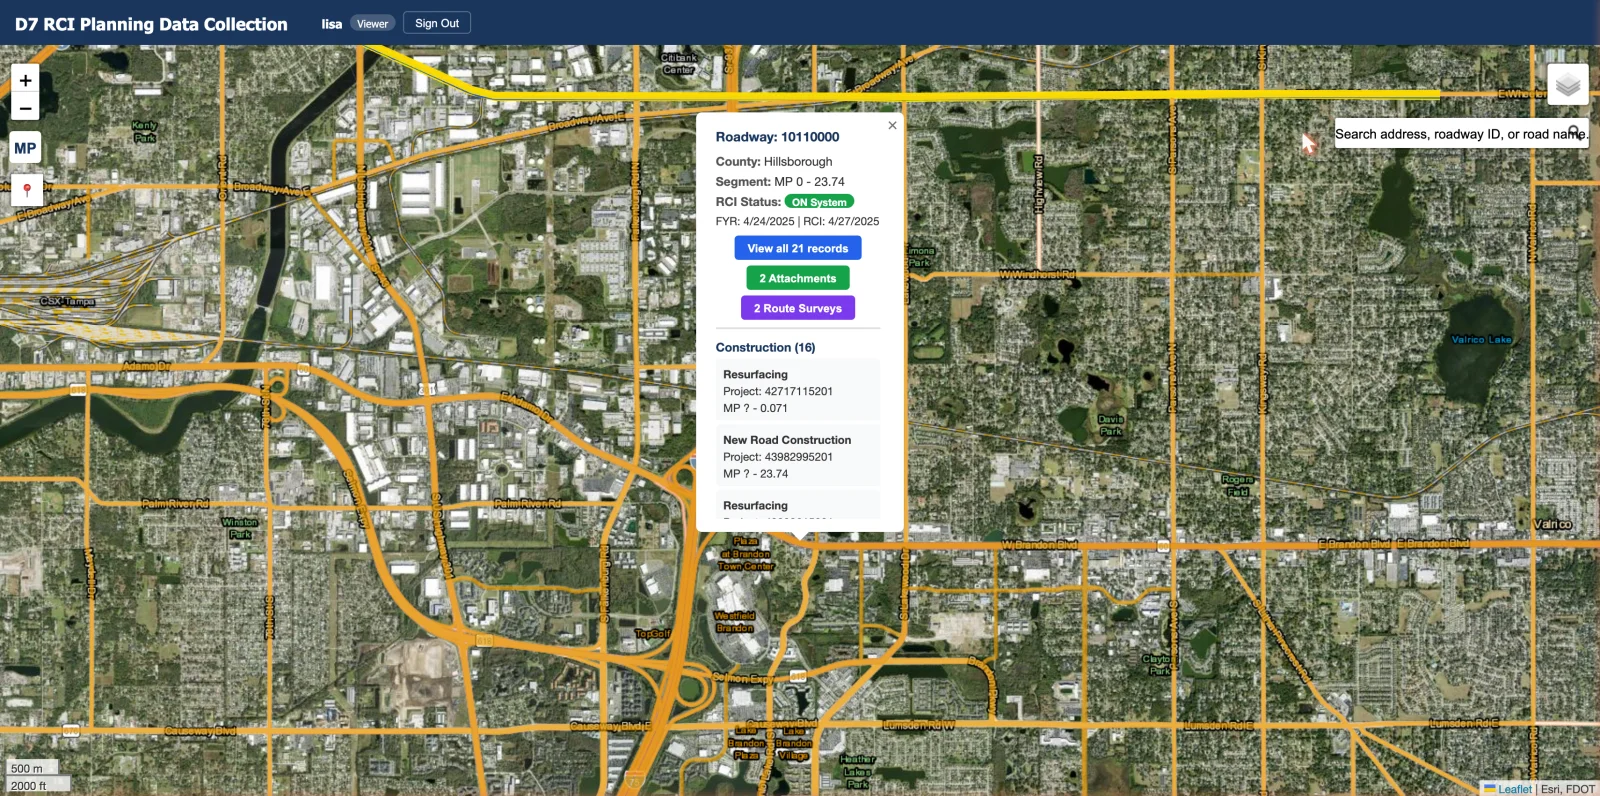
Zoom in to about street level, then click any roadway segment. The app highlights it and opens a popup that summarizes the segment:
- Roadway ID, county, and the segment's milepost range.
- An RCI status badge (for example ON System) and key dates.
- Quick links such as
View all N records,N Attachment(s), andN Route Survey(s)— click any of these to open the results panel on that data.
7. The results panel
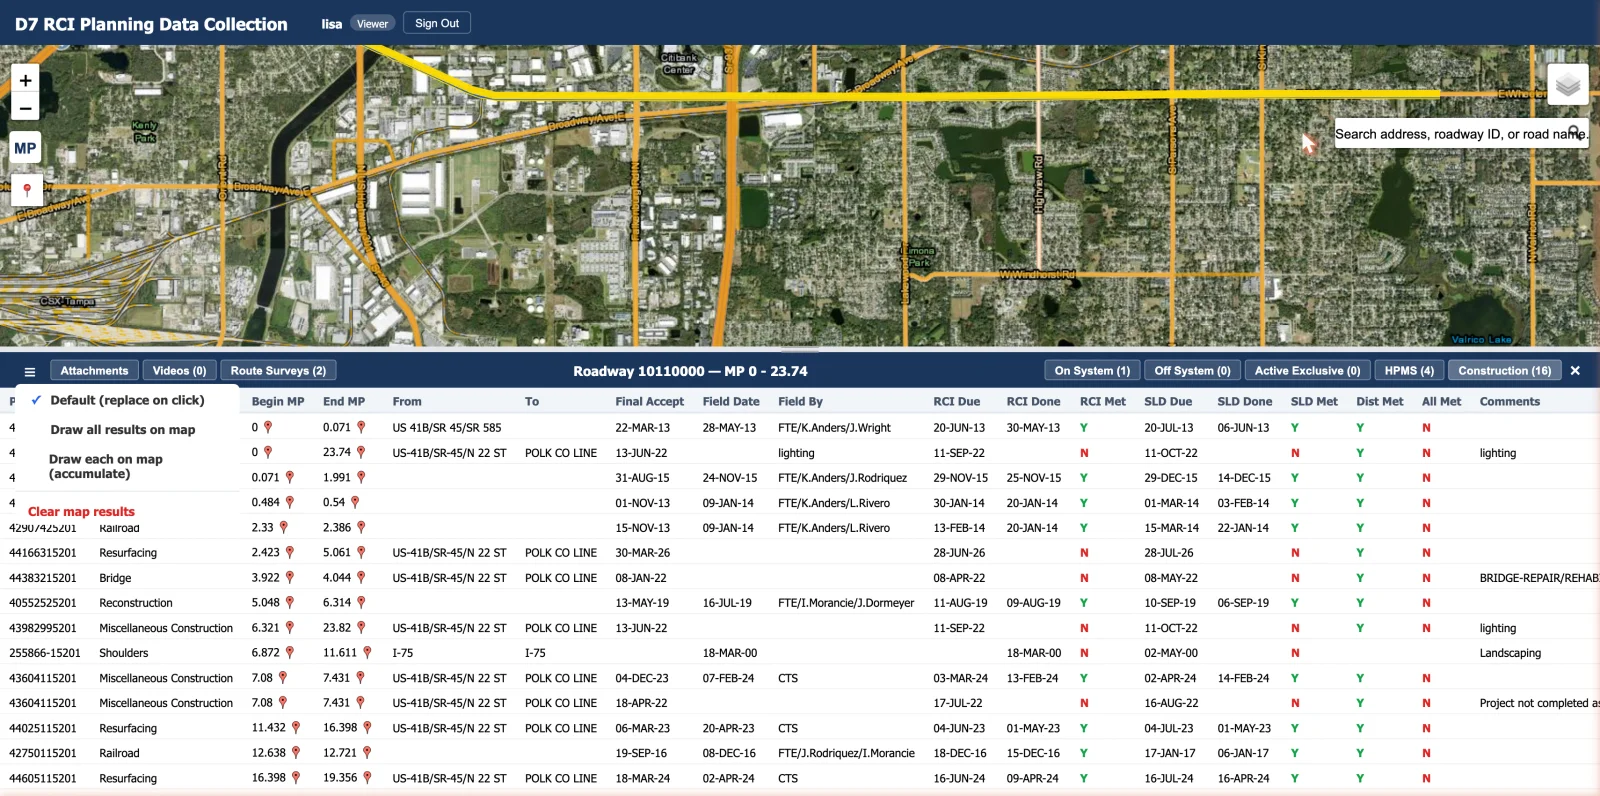
The panel at the bottom of the screen holds all the data tables for the selected roadway. It opens automatically when you click a roadway or a popup link.
- Resize it — drag the gray handle at the top of the panel up or down.
- Close it — click the
×in the top-right of the panel. - Switch tables — use the tabs along the top (see the next two sections).
Draw tools (the ☰ menu)
The hamburger menu (☰) on the left of the panel header controls how table rows are drawn on
the map when you click them:
| Mode | Behavior |
|---|---|
| Default (replace on click) | Clicking a row highlights just that record, replacing the previous one. |
| Draw all results on map | Shows every record in the table on the map at once. |
| Draw each on map (accumulate) | Each row you click stays on the map, building up a set. |
| Clear map results | Removes the drawn records from the map. |
8. RITA record tabs
The tabs on the right side of the panel header show the different categories of RITA / RCI data for the roadway. Click a tab to switch tables:
| Tab | What it shows |
|---|---|
| On System | RCI master records for state-system roadways. |
| Off System | RCI records for off-system roadways. |
| Active Exclusive | Active exclusive RCI records. |
| HPMS | Highway Performance Monitoring System records and their 3-year "Met" status. |
| Construction | Construction projects with project ID, milepost range, and Met status. |
Expanding a record for detail
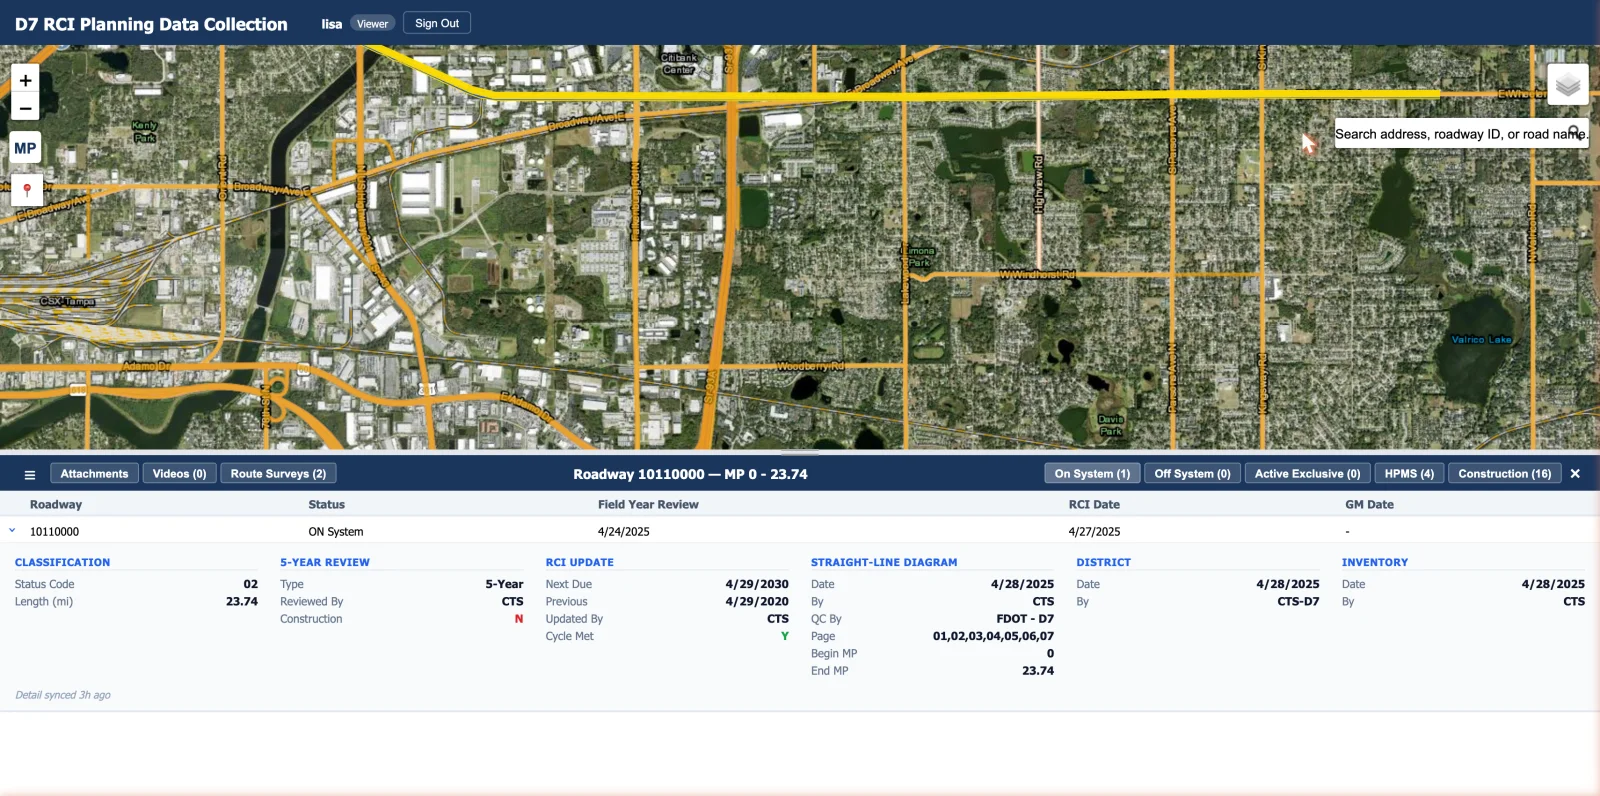
In the On System / Off System / Active Exclusive tables, click a row to expand it. The detail view groups the fields into sections such as Classification, 5-Year Review, RCI Update, Straight-Line Diagram, District, and Inventory. Yes/No flags are colored green or red for quick scanning, and a footer notes when the detail was last synced.
9. Attachments
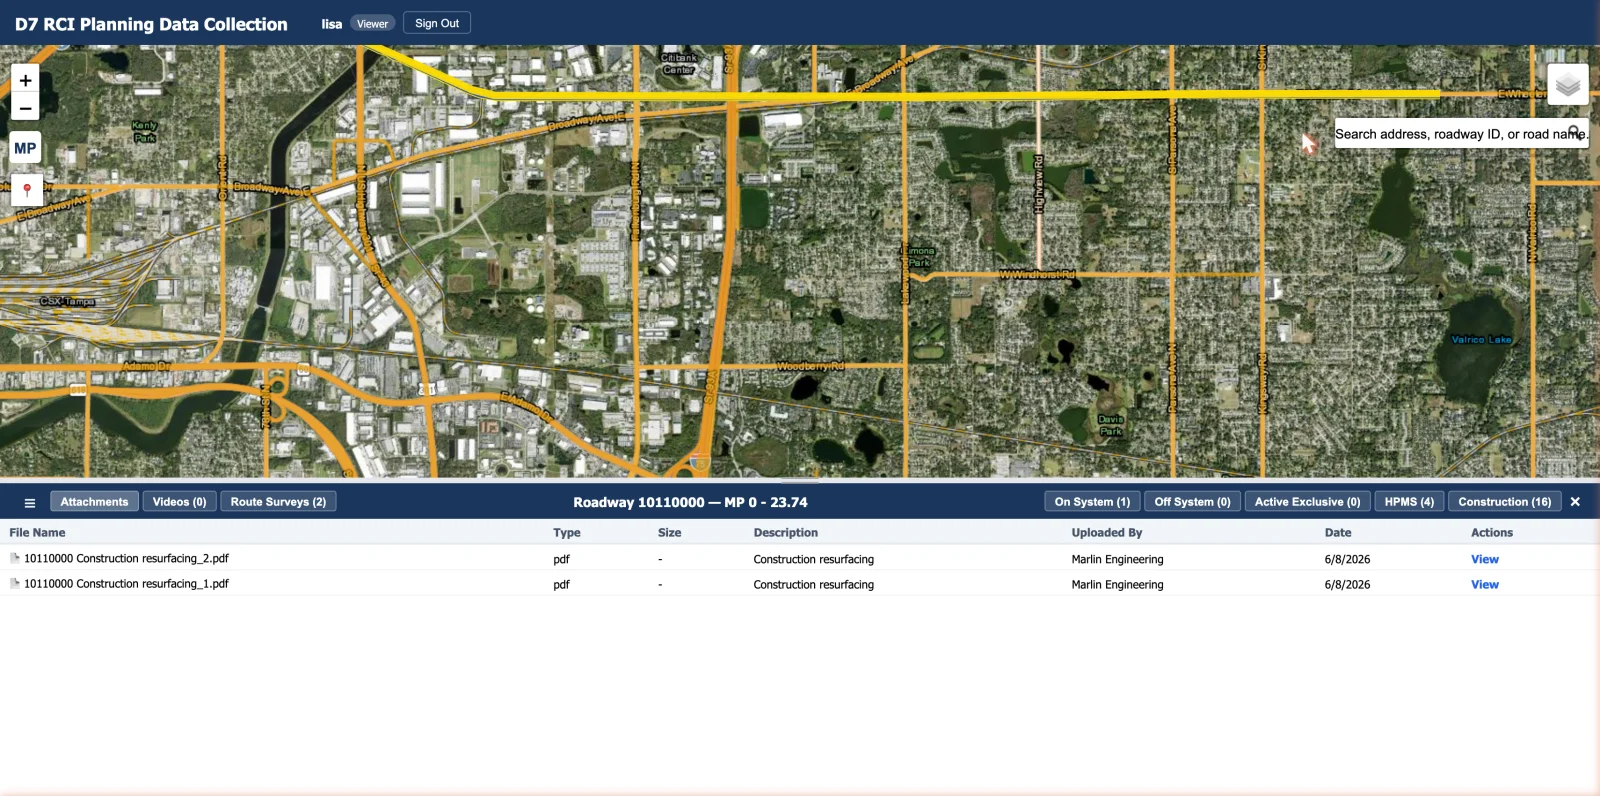
The Attachments tab lists supporting files for the roadway — documents, images, and other uploads. For each file you'll see its name, type, size, description, who uploaded it, and the date.
To open or download a file, click its View link in the Actions column.
10. Videos
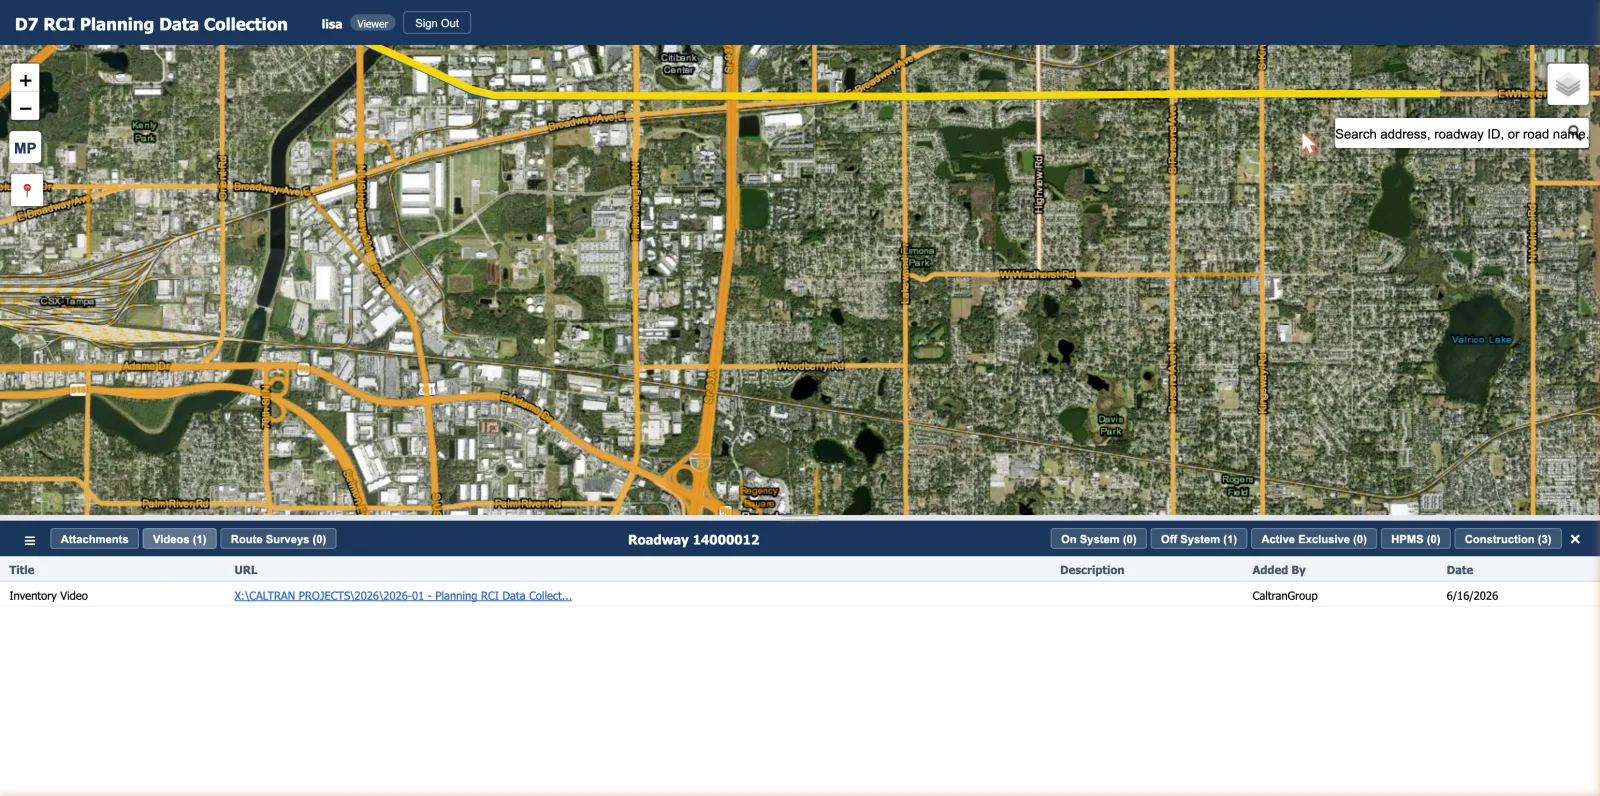
The Videos tab lists video links associated with the roadway. Each row shows a title, the link, a description, who added it, and the date. Click a link to open the video in a new browser tab.
11. Route surveys & footage
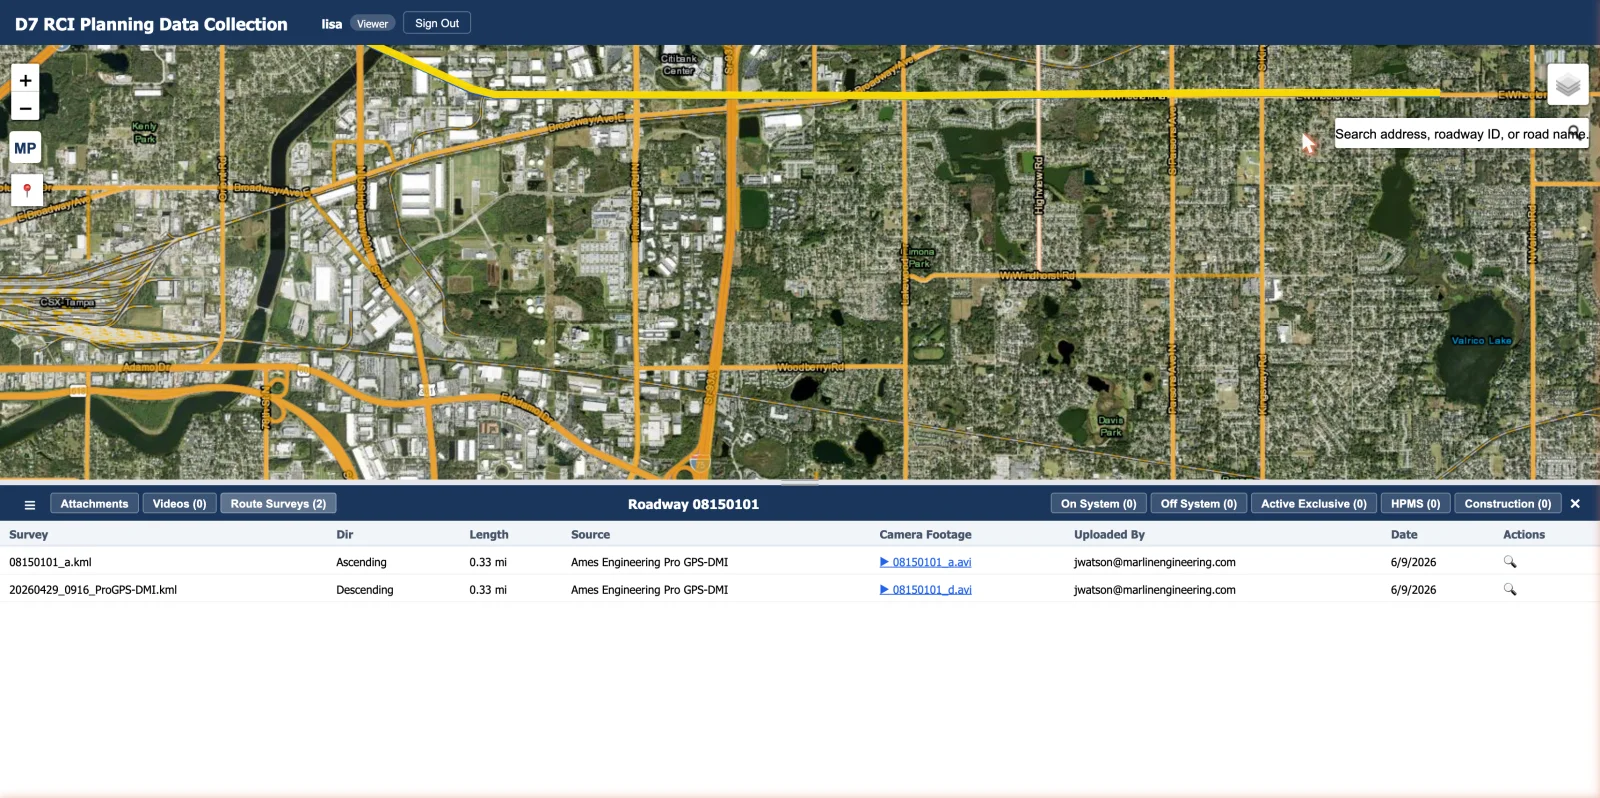
The Route Surveys tab lists drive-route surveys for the roadway. Each survey shows its name, direction (ascending/descending), length, source system, available camera footage, who uploaded it, and the date.
- Zoom to a route — click the magnifier (
🔍) in the Actions column to fit the map to that survey's extent (highlighted in yellow). - Play footage — in the Camera Footage column, click a
▶video link to open the player. (Videos still processing show a progress note instead of a play link.)
Watching footage with the moving dot
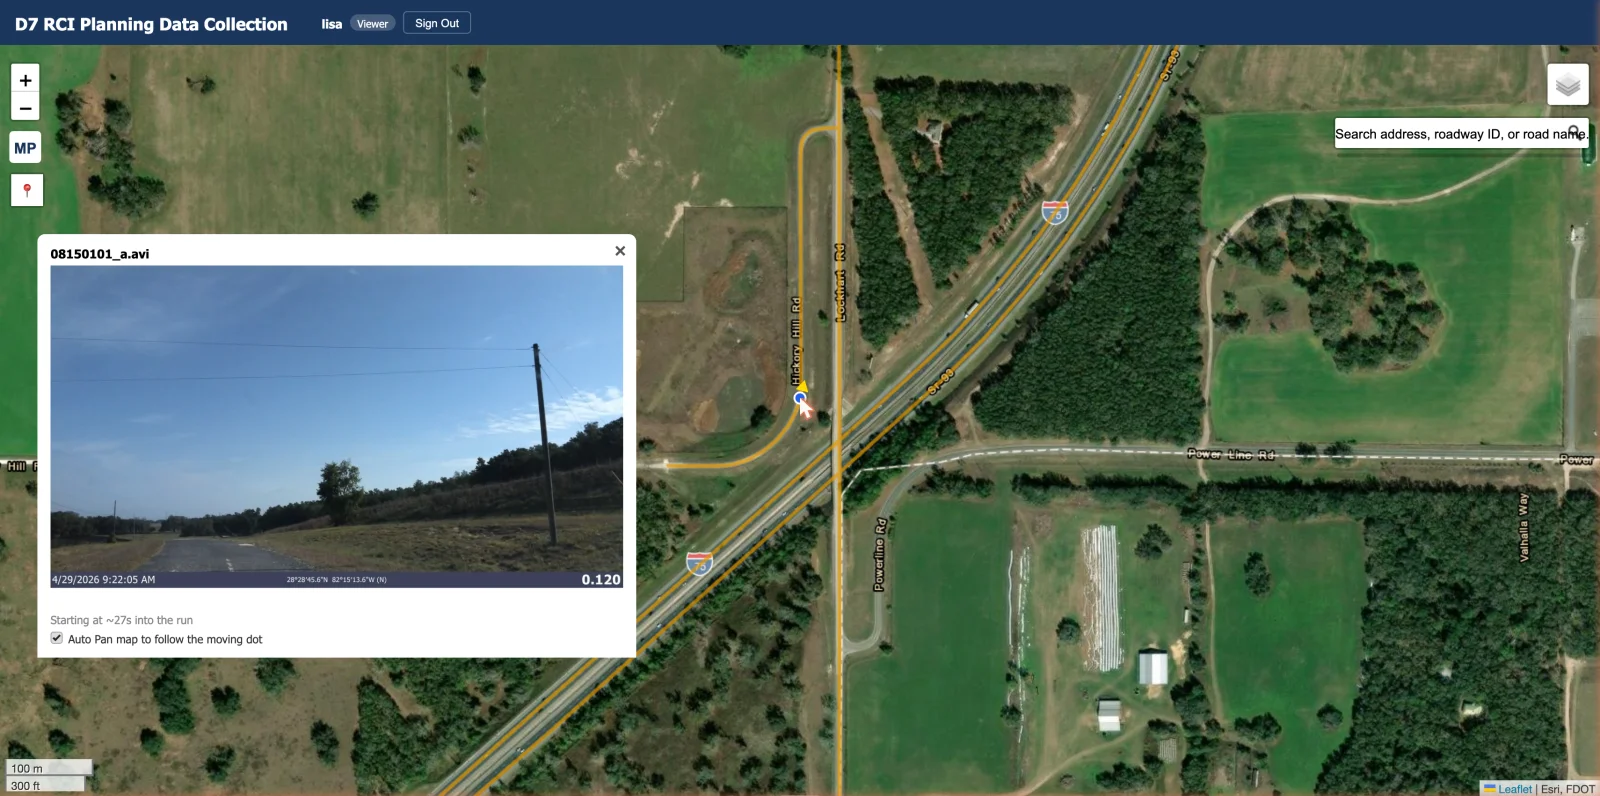
When you play route-survey footage, a video player opens (you can drag it by its title bar and resize it). As the video plays, a moving dot travels along the roadway on the map, synced to the video — a blue dot with an arrow showing the direction of travel. This lets you see exactly where the camera is at each moment.
- Use the player's standard controls to play, pause, seek, change volume, or go full-screen.
- Keep Auto Pan map to follow the moving dot checked to have the map follow along; uncheck it if you'd rather keep the map still.
- A short "Building GPS track…" message may appear while the moving dot is prepared.
12. What you won't see (and why)
Because the Viewer role is read-only, the app hides editing tools to keep your view simple. You will not see:
- The Admin link in the header.
- + Add Attachment, + Add Video Link, + Upload Route Survey, and + Add Footage buttons.
- Edit (✎) and delete (🗑️) buttons in any table.
- The "New Survey" KML upload tool on the map.
This is expected — nothing is broken. If your work requires these tools, contact your administrator about a Contributor account.
13. Tips & FAQ
The roadway popup won't appear when I click.
Zoom in further. Roadway identification works once you're zoomed in to roughly street level.
A footage video shows "processing" instead of a play link.
The video is still being prepared on the server. Check back shortly and it will become playable.
The moving dot didn't appear during playback.
Some footage may not have a usable GPS track; in that case the video still plays, just without the synced dot. If it's still "Building GPS track…", give it a moment to finish.
How do I get back to the start?
Close the results panel with ×, then use Search or the map to pick a new roadway. Use
Sign Out (top-right) to end your session.